
Homemade breakfast crepes are a delightful way to start the day. These thin, delicate pancakes originate from France but have become popular worldwide for their versatility and elegance. Making crepes at home is simple and requires just a few basic ingredients: flour, eggs, milk, butter, and a pinch of salt.
The key to perfect crepes lies in the batter consistency and cooking technique. A smooth, lump-free batter is essential for achieving the characteristic thinness of crepes. Many recipes recommend blending the ingredients and letting the batter rest for at least an hour before cooking. This resting period allows the flour to fully absorb the liquid, resulting in a more tender texture.
Cooking crepes requires a bit of practice but is easily mastered with patience. A non-stick pan or well-seasoned crepe pan works best for achieving that golden-brown color without sticking. The batter should be poured and swirled quickly to create a thin, even layer. Once cooked, crepes can be filled with sweet or savory ingredients, making them suitable for breakfast, lunch, or dinner.
Essentials of Crepe Batter
Mastering crepe batter is crucial for creating delicate, flavorful crepes. The key lies in selecting quality ingredients, achieving the right consistency, and employing proper mixing techniques.
Ingredients Breakdown
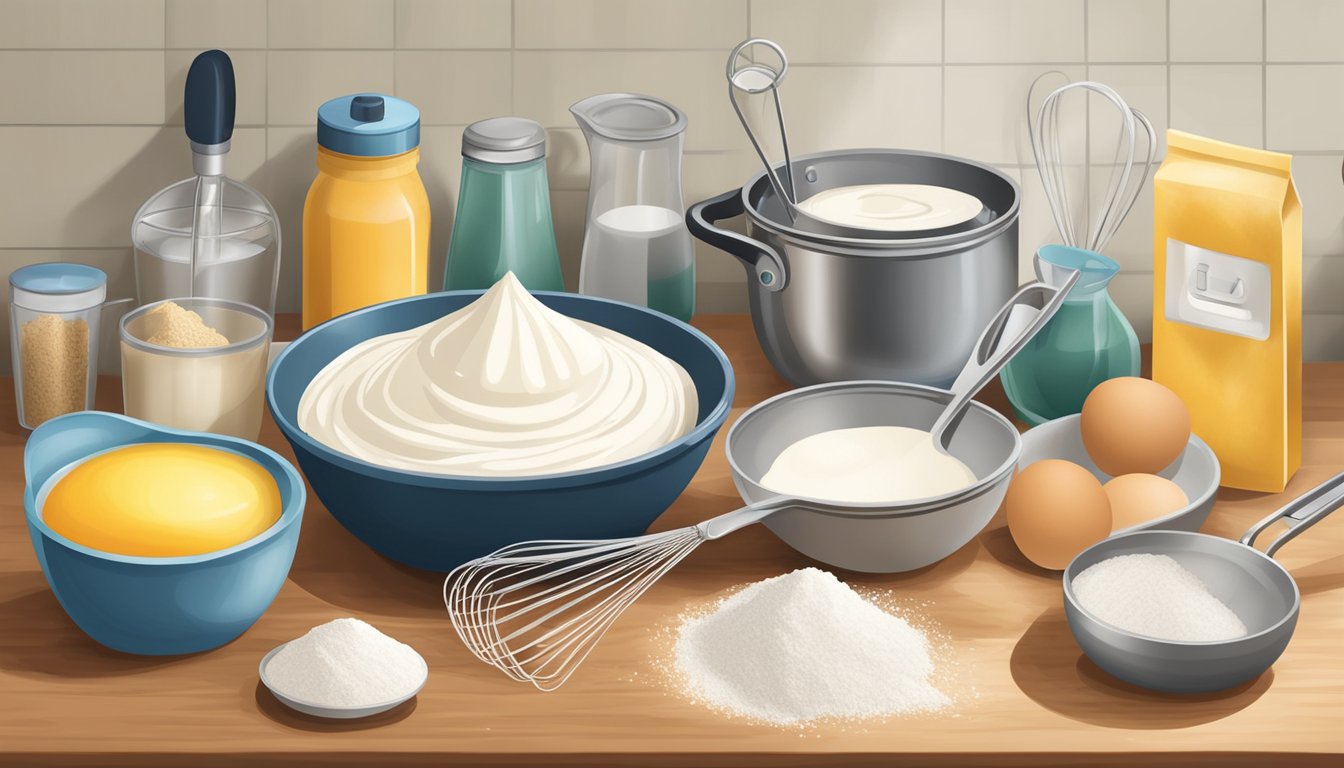
Eggs provide structure and richness to crepe batter. Use fresh, room-temperature eggs for best results. Milk adds moisture and flavor – whole milk creates richer crepes, while low-fat options work for lighter versions.
All-purpose flour forms the base of the batter. Sift it to remove lumps for a smoother texture. A pinch of salt enhances the overall flavor profile.
Sugar is optional but adds a subtle sweetness. Use 1-2 tablespoons for dessert crepes or omit for savory varieties.
Melted butter or oil contributes to tenderness and prevents sticking. Unsalted butter imparts a richer taste.
Batter Consistency
Crepe batter should be thin and pourable, similar to heavy cream. This ensures even spreading in the pan and results in delicate crepes.
To achieve the right consistency, use a 1:1 ratio of flour to liquid (milk or water). Adjust as needed – add more liquid if too thick or more flour if too runny.
Let the batter rest for 30-60 minutes before cooking. This allows the flour to fully hydrate and results in more tender crepes.
Mixing Techniques
A blender is ideal for creating smooth, lump-free batter. Add wet ingredients first, then dry ingredients. Blend on low speed initially, then increase to high for about 10 seconds.
Alternatively, use a whisk. Combine dry ingredients in one bowl and wet in another. Gradually add wet to dry, whisking constantly to prevent lumps.
Scrape down the sides of the bowl or blender to incorporate all ingredients fully. Strain the batter through a fine-mesh sieve for extra smoothness if desired.
Preparing the Crepe Equipment

The right tools make crepe-making easier and more enjoyable. Proper equipment ensures consistent results and allows for efficient preparation of these delicate French pancakes.
Choosing the Right Crepe Pan
A dedicated crepe pan is ideal for making perfect crepes. These pans have low, sloped sides and a flat cooking surface. Cast iron or carbon steel crepe pans distribute heat evenly and develop a natural nonstick surface over time. Seasoning the pan regularly maintains its nonstick properties.
For beginners, a nonstick crepe pan offers ease of use. Look for a pan with a 10-12 inch diameter to accommodate standard crepe sizes. Some crepe pans come with a wooden spreader tool to help distribute batter evenly.
Using a Nonstick Skillet
A standard nonstick skillet can substitute for a crepe pan. Select a pan with a smooth, flat bottom and gently sloped sides. A 10-inch skillet works well for most crepe recipes.
Preheat the skillet over medium heat before adding batter. Test the temperature by sprinkling a few drops of water on the surface – they should sizzle and evaporate quickly.
To prevent sticking, lightly grease the pan with butter or oil before cooking each crepe. Use a paper towel to spread a thin, even layer of grease across the surface.
Essential Utensils
A blender or food processor quickly mixes crepe batter to a smooth consistency. This ensures lump-free batter and saves time compared to mixing by hand.
A 1/4 cup measuring cup helps portion batter accurately for each crepe. Pour batter into the center of the pan, then tilt and swirl to spread it evenly.
A rubber or silicone spatula is crucial for flipping crepes. Choose a thin, flexible spatula that can easily slide under the delicate edges without tearing.
A small ladle or crepe spreader tool helps distribute batter evenly across the pan. This promotes uniform thickness and cooking.
Keep a plate or cooling rack nearby to stack finished crepes. Place parchment paper between each crepe to prevent sticking.
Cooking the Crepes
Mastering the art of cooking crepes requires attention to detail and proper technique. The key lies in achieving a thin, delicate texture while maintaining even heat distribution throughout the cooking process.
The Cooking Process
Heat a non-stick pan or crepe griddle over medium heat. Lightly grease the surface with unsalted butter or cooking spray. Pour about 1/4 cup of batter into the center of the pan. Quickly tilt and rotate the pan to spread the batter in a thin, even layer.
Cook for 1-2 minutes until the edges start to brown and the surface appears dry. Use a thin spatula to gently lift and flip the crepe. Cook the other side for 30-60 seconds until light golden spots appear.
Transfer the cooked crepe to a plate. Stack crepes with parchment paper between each layer to prevent sticking.
Achieving the Perfect Texture
To create delicate crepes with the ideal texture, ensure the batter is smooth and free of lumps. Let it rest for at least 30 minutes before cooking to allow the flour to absorb the liquid fully.
Use a ladle or measuring cup to pour the batter consistently. Aim for a thin, even layer that covers the pan’s bottom. Swirl the pan immediately after pouring to spread the batter quickly.
Cook crepes until they’re golden brown with lacy edges. Avoid overcooking, which can lead to dry, crispy crepes instead of soft, pliable ones.
Temperature Control
Maintaining proper temperature is crucial for perfectly cooked crepes. Start with a medium heat setting and adjust as needed. The pan should be hot enough that the batter sizzles gently when poured.
If the pan is too hot, crepes will cook unevenly and may develop dark spots. If it’s too cool, crepes will take too long to cook and may become rubbery.
Test the temperature by cooking a small crepe first. Adjust the heat if necessary before cooking the rest of the batch. Allow the pan to reheat between crepes for consistent results.
Sweet and Savory Fillings
Crepes offer endless possibilities for fillings, from indulgent sweet options to hearty savory combinations. The key is to choose complementary flavors and textures that enhance the delicate crepe base.
Preparing Sweet Fillings
Sweet crepes can be filled with a variety of delectable ingredients. Spread Nutella or chocolate-hazelnut spread for a rich, chocolatey treat. Add fresh fruit like strawberries, bananas, or raspberries for natural sweetness and a burst of flavor.
For a classic touch, use whipped cream or pastry cream as a base. Top with jam or lemon curd for added zing. Apple pie filling offers a comforting, warm option perfect for autumn mornings.
Consider creating a DIY crepe bar with an assortment of sweet fillings. This allows guests to customize their crepes to their liking, making breakfast a fun and interactive experience.
Creating Savory Fillings
Savory crepes provide a satisfying meal any time of day. A classic combination is ham and cheese, which can be enhanced with a sprinkle of fresh herbs. Sautéed mushrooms and spinach create a earthy, vegetarian-friendly option.
Experiment with different cheeses like feta or goat cheese for added flavor. Crispy bacon pairs well with scrambled eggs and diced tomatoes. For a Mediterranean twist, try a filling of spinach, feta, and sun-dried tomatoes.
Ratatouille, a French vegetable stew, makes an excellent filling for those seeking a hearty vegetable option. Bell peppers, onions, and zucchini can be sautéed together for a colorful and nutritious filling.
Assembling and Serving Crepes
The art of assembling and serving crepes involves layering delicious components and presenting them attractively. Proper technique enhances both flavor and visual appeal.
Layering Components
Start with a warm crepe on a plate. Spread a thin layer of desired filling across the center. Common sweet options include Nutella, jam, or sweetened cream cheese. For savory crepes, use ingredients like ham, cheese, or sautéed vegetables.
Fold the crepe in half, then in half again to form a triangle. Alternatively, roll it up like a cigar for a different presentation. Add toppings to complement the filling.
For sweet crepes, sprinkle powdered sugar on top. Add fresh berries or sliced bananas for extra flavor and color. A classic combination is lemon juice and sugar.
Savory crepes pair well with a light salad or soup on the side. Drizzle with hollandaise sauce or sprinkle with fresh herbs for added taste and visual appeal.
Presentation Tips
Arrange crepes on a white or light-colored plate to make colors pop. Stack two or three crepes for a more substantial serving. Offset them slightly to showcase the layers and fillings.
Use a small sieve to dust powdered sugar evenly over sweet crepes. This creates a professional, bakery-style finish. Arrange fresh berries or banana slices in a decorative pattern on top or around the plate.
For savory crepes, add a small side of mixed greens or a colorful vegetable garnish. A sprig of fresh herbs adds a touch of elegance. Drizzle maple syrup or chocolate sauce in an artistic pattern around sweet crepes.
Serve immediately while crepes are still warm. Provide appropriate utensils, such as a dessert fork for sweet crepes or a knife and fork for savory ones.
Advanced Crepe Variations
Crepes offer endless possibilities for culinary creativity. Exploring regional styles and innovative crepe cakes can elevate your breakfast experience to new heights.
Regional Crepe Styles
French crepes remain the gold standard, but many cultures have developed their own unique variations. In Brittany, buckwheat flour crepes called galettes are a savory staple. These thin, lacy crepes have a nutty flavor and hearty texture.
Japanese-style crepes often feature elaborate sweet fillings and cone-shaped presentations. Russian blini are small, yeasted crepes traditionally served with caviar or smoked salmon.
Turkish gözleme are savory crepes filled with meat, cheese, or vegetables, then grilled until crispy. Indian dosa, made from fermented rice batter, offer a gluten-free alternative with a tangy flavor.
Innovative Crepe Cakes
Crepe cakes transform the humble crepe into a showstopping dessert. This labor-intensive creation involves stacking 20-30 thin crepes with alternating layers of filling.
Popular fillings include pastry cream, Nutella, or fruit compote. Some bakers incorporate matcha, chocolate, or even savory ingredients like smoked salmon and cream cheese.
The cake is often finished with a glaze or ganache and chilled before serving. When sliced, the layers create a visually striking effect. Crepe cakes require patience and precision but offer a unique twist on traditional crepes.
Storing and Making Crepes Ahead Time
Preparing crepes in advance can save time and effort. Proper storage techniques ensure your crepes stay fresh and delicious for later use.
Refrigeration Strategies
Crepe batter can be made ahead and stored in the refrigerator. Mix the ingredients and place the batter in an airtight container. Let it rest for at least 30 minutes before using, or refrigerate for up to 24 hours.
For cooked crepes, layer them between sheets of wax paper or parchment paper. This prevents sticking and makes it easy to separate them later. Place the stack in an airtight container or resealable plastic bag.
Refrigerated crepes will stay fresh for 2-3 days. Be sure to label the container with the date to track freshness.
Freezing for Long-Term Storage
Freezing extends the shelf life of crepes for up to 2 months. Allow cooked crepes to cool completely before freezing.
Stack crepes with wax paper between each layer. Wrap the stack tightly in plastic wrap, then place in a freezer-safe bag or container. Remove as much air as possible to prevent freezer burn.
For individual servings, separate crepes with wax paper and wrap them individually. This allows for easy thawing of single portions.
Reheating Instructions
To reheat refrigerated crepes, warm them in a skillet over low heat for about 30 seconds per side. Alternatively, microwave for 10-15 seconds.
For frozen crepes, thaw in the refrigerator overnight. Once thawed, reheat using the same methods as refrigerated crepes.
Avoid overheating, as this can dry out the crepes. If desired, add a small amount of butter to the pan when reheating to enhance flavor and prevent sticking.
Reheated crepes can be filled with various ingredients such as fruits, chocolate, or savory options like cheese and ham. Serve immediately for the best taste and texture.